
To thank a lovely friend of mine for donating to my Go Fund Me campaign, I wanted to make something special for her. I had a few ideas, but finally settled on decoupage coasters. I got the idea from a GeicoNow magazine I occasionally receive, believe it or not (firstly, who knew Geico had a magazine, and secondly, that it'd offer craft projects!), and hurried to Michael's and Floor and Decor to get the materials.

This is my first time decoupaging anything, and it seems that several things are key to good decoupaging- some sort of paper or fabric picture/design that will be pasted onto the solid object, a solid object, decoupage glue, and acrylic sealer. I knew immediately that I wanted to use scrapbook paper. Originally I wanted to find scrapbook paper with cats on it, but hunting through the scrap-booking aisle at Micheal's, I couldn't find anything close. I was so disappointed, but finally settled on the black and white paw-print paper that I did see. After going back and forth with myself I kept it and decided that it actually serves as a good symbol for both cats and dogs, and will represent Leslie's love and protection of the felines in her life. Also, the picture that I am using for the Go Fund Me campaign is a pawprint, so I think it works. The scrapbook paper was fairly inexpensive, and I just needed two sheets to make 4 coasters.
The square ceramic tiles I used were about 4.25 x 4.25 inches, a little bigger than I was looking for, but they did the job. They were very inexpensive as well, $.12 each, so I bought 16 so I could make other designs later. I actually loved walking through Floor and Decor. I know nothing about tile or wood or house design, but I know I loved the feeling of inspiration that filled me as I walked through the aisles. I'll be back!
I went with Martha Stewart Decoupage Glue and Sealer as my adhesive medium. From what I've read online, other people swear by Mod Podge but I liked the price point of this one ($3.99 for 4 oz) and that it is a glue and sealer in one.
I had the most DIFFICULT time trying to find waterpoof acrylic sealer, and I couldn't decide between two options so bought them both! FolkArt Clearcote Extra Thick Glaze and Americana Acrylic Sealer/Finisher Gloss. The FolkArt was on clearance for $3.99, but the Americana was regularly priced at $6.99.
On to the project!

Materials:
4 square ceramic tiles (mine were 4.25 x 4.25 inches)
scrapbook paper (I used two sheets of 12 x 12 inch scrapbook paper)
Pencil
Exacto knife
Cutting board
Tape measure or Ruler
Decoupage Glue (I used Martha Stewart Decoupage Glue and Sealer)
Acrylic Sealer (I used Americana Acrylic Sealer/Finisher Gloss)
Additional paintbrush with flat bristles (optional)
Old newspaper to cover your workstation
Package of cork tiles (I was going to get Artminds Cork Tiles but you can use a sheet of cork and cut it to fit the bottom of your tiles if needed)
Hot glue or Wood glue (I used Elmer's Wood Glue)
Popsicle stick (or can use ruler or something with a flat edge)
How-to:
~ Cut your scrapbook paper into squares that are one inch longer than your tile on each side. For me, it was easier to do this using a pencil and ruler and then using the exacto knife to cut out the squares on my cutting board.
~ Using the brush that comes with the decoupage glue, or your own brush, spread decoupage glue all over the tile. I found it easier to pick up a small glob of glue and spread it on each third of the tile. One stroke of glue wasn't enough to cover the whole tile.
~ Spread decoupage glue on the back of the scrapbook paper (i.e., the design is facing down). Center the paper on the tile and press down. Then use a popsicle stick or a small, flat object to smooth out any air bubbles, working from left to right. I actually used the small rectangular box that my Corksickle came in, and it did the job perfectly. No warped paper, no air bubbles, and I was left with a very clean surface. I would start in the middle, press down the edge of the box, and press from left to right to smooth the surface. Then I would repeat that a couple of times to be sure the paper was smooth.
~Fold the edges of the scrapbook paper over the edges of the tile. The instructions called for hot gluing the edges, which is a lot less messy than using the decoupage glue to hold them down. I didn't have a hot glue gun, so I just used the decoupage glue.
~Spread a thin layer of decoupage glue onto the entire surface area of your tile. This will help adhere and set the scrapbook paper onto the tile.
~Let the tiles dry. It will take about an hour for the tiles to dry almost completely. After drying, apply another coat of the decoupage glue if you are using the Martha Stewart Decoupage Glue and Sealer. As indicated on the back of the bottle, the first layer acts as an adhesive, and the second as a sealer. If looking for additional shine, continue to next step.
~ Lightly spray with acrylic sealer to set the design and add sheen. Let completely dry. If desired, you can spray additional coats of sealer on to get more sheen, letting dry completely between coats. Please be careful when spraying the sealer. I sprayed mine then opened the patio door and turn on the ceiling fan to ventilate the area. You don't want to breathe in those fumes!
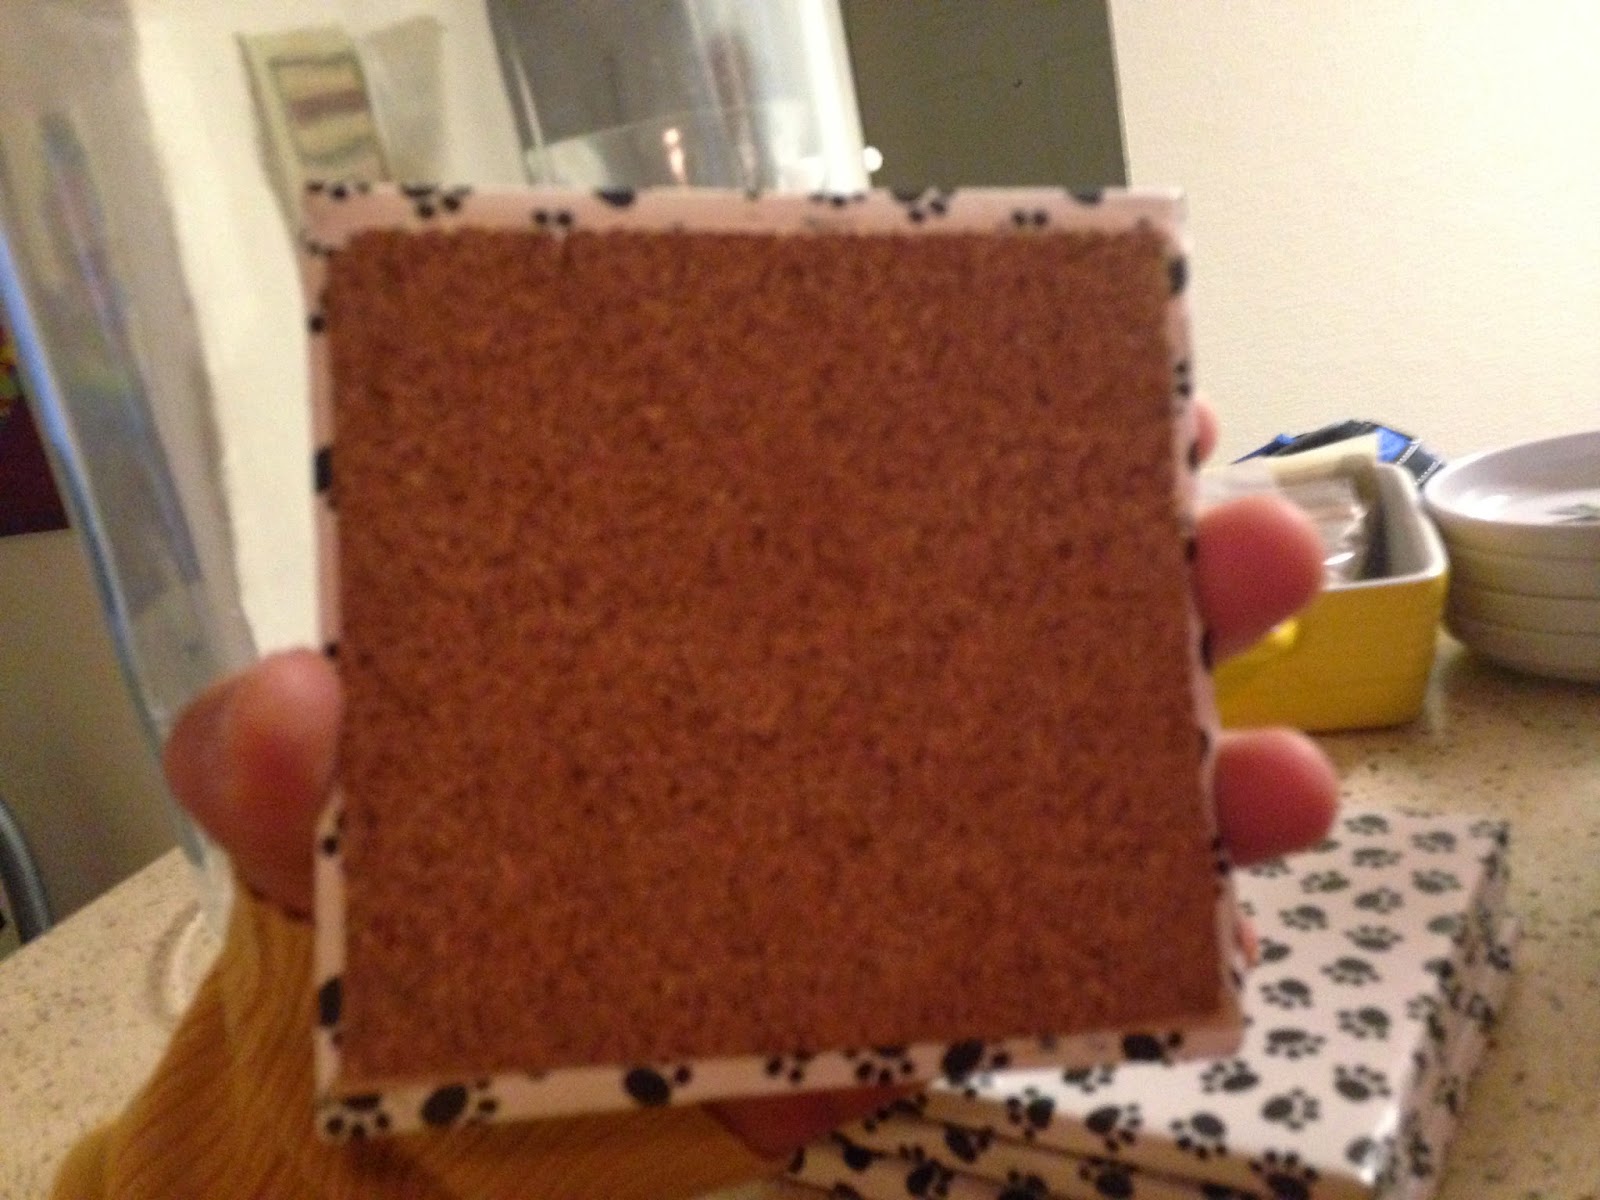
~Glue cork onto the bottom of the tiles and let dry completely. I suggest drying on a wire rack. Drying on paper might mean bits of paper get stuck to the bottom of your coaster.
Voila! You've made your own decoupage coasters!

Did you make some coasters? Was it easy? Hard? Tell me all about it!
xoxo
~Lexy
No comments:
Post a Comment